

If you've ever had a wood chipper break down mid-yard cleanup or biomass prep, you know it's not just an annoyance-it's a full stop to your project. Last month, a regular customer (who also buys our Wood Chipper Machine line for his tree service and small biomass operations) reached out in a panic: his chipper was making a godawful grinding noise, and he'd spent 2 hours troubleshooting before realizing the main feed roller bearings were shot. I didn't just send over a new set of bearings-I walked him through the fix step-by-step, and today I'm sharing that exact process here, straight from a supplier who deals with these machines every single day. No fancy jargon, no confusing manuals, just real, hands-on advice that works.
First, let's get one thing straight: if you don't do routine checks on your bearings, you're asking for headaches. I tell all my customers (and anyone who'll listen) to pop the access panel and inspect the bearings every 10 hours of use, or at least once a week if the machine's getting heavy duty. Bearing issues usually don't come out of nowhere-there are telltale signs: that gritty, rumbling grind that gets louder when you push through a thick branch, inconsistent chip size, or even the whole machine vibrating like it's got a loose bolt (though that's a separate problem). Our Biomass Pellet Equipment line uses similar bearing setups, so a lot of this advice transfers over too, which is a nice bonus if you have multiple machines from our lineup.
Before you even grab a wrench, let's cover the non-negotiables. First, turn the machine OFF, unplug it (or flip the gas tank valve closed and drain the line if it's gas-powered), and lock out the power source-like, put a "DO NOT OPERATE" tag on it. I can't stress this enough: a buddy of mine skipped that step once and nearly lost a finger when the chipper blades kicked on mid-repair. Next, gather your tools: a socket set (deep sockets work best for tight spots), a bearing puller (you can get a cheap one at any hardware store, but spring for the 2-jaw if you plan on doing this more than once), a mallet (rubber is better for avoiding dents), new matching bearings (always buy the exact model number-don't guess!), some high-temperature grease (NLGI 2 works for most chipper applications), and a rag. If your bearings are corroded or really stuck, a can of penetrating oil (like WD-40 Specialist, not the cheap stuff) will save you a ton of time.
Now, let's get to the actual replacement. First, figure out which bearing is bad. For most standard wood chippers, you've got two main bearings-one on each end of the feed roller, the part that pulls wood into the cutting chamber. Rarely, it's the blade shaft bearing, but that's less common (and we'll cover that at the end if you run into that). Let's start with the feed roller bearings, since that's what my customer had to replace.
Step 1: Remove the external parts blocking access. That means taking off the feed hopper (the big metal chute you dump branches into), the guards around the roller, and any bolts holding the bearing housing in place. Pro tip: take a photo of the setup before you start unbolting-no shame in snapping a quick pic with your phone so you don't mix up parts when you put it back together.
Step 2: Free the old bearing. This is where patience pays off. If the bearing's loose, you might be able to just wiggle it out by hand. More likely, it's wedged in there tight. Spray penetrating oil around the edges, wait 15 minutes, then grab your bearing puller. Attach the puller jaws to the inner ring of the bearing (never the outer one-you'll damage it that way) and slowly turn the puller's screw. If it's still stuck, tap the puller's center screw gently with a mallet to loosen things up. Don't use brute force here-you can crack the housing or bend the roller, and that's a way bigger fix than a bearing swap. If you don't have a puller, you can try driving a long punch between the bearing and housing to tap it out from the inside, but go super slow here-again, no bending parts.
Step 3: Prep the new bearing and the housing. Once the old bearing's out, clean the housing with a rag (wipe out all old grease, wood dust, and gunk-any debris left here will ruin your new bearing fast). Don't skip this step. If you have any rust on the housing, use some steel wool to buff it smooth so the new bearing seats evenly. Now, the new bearing: if it's sealed on both sides, make sure you don't peel off the protective plastic on the inner side (that side faces the roller). If it's a open bearing, you'll grease it later, but keep it clean for now.
Step 4: Install the new bearing. This is the part where alignment is key. Line the bearing up perfectly with the housing (it should sit flush, no gaps around the edge), then gently tap it into place with a mallet. Do NOT tap directly on the bearing's outer ring-use a block of wood or a socket that's the exact same size as the outer ring to spread the force evenly. Keep tapping until the bearing is fully seated all the way around. If it's not sitting straight, you'll get wobble, noise, and a short bearing life. My customer almost messed this up by tapping the edge; he used a scrap 4x4 block and it slid right in evenly.
Step 5: Grease and reassemble. Once the bearing's in, pop a good amount of high-temperature grease into the housing (don't overpack it-about ⅔ full is right; too much grease will get hot and cause issues) and put the roller back. Reattach the bearing housing bolts (torque them to the manufacturer's specs-you can find that in your machine's manual, or shoot me a message and I'll send it over), then put the guards, feed hopper, and all external parts back on. Double-check every bolt before you test it.
Wait, what if it's the blade shaft bearing instead? That's a different setup. The blade shaft is what holds the cutting blades, so it's under a lot of stress. The process is similar, but you'll have to disconnect the drive belt first before accessing the bearing. Same rule: lock out the power, use a puller to remove the old bearing, clean the housing, seat the new bearing evenly, grease, and reassemble. The only extra here is making sure the blade timing is right when you put it back together-if you mess that up, the chipper will chip unevenly or even jam.
Now, let's talk about common mistakes I see people make that make bearing replacements go wrong. First, using the wrong bearing. A lot of folks grab a generic bearing from the hardware store, but wood chippers run at high speeds and get covered in wood dust and moisture-you need a bearing rated for high load and extreme conditions. That's why we supply exact replacement bearings for all our Wood Chipper Machine models, no guessing required. Second, skipping the pre-repair check. I once had a customer replace a bearing, only to find out the drive belt was stretched, which put extra stress on the new bearing and made it fail in 2 hours. Always check for other issues while you're in there. Third, over-greasing. Too much grease traps heat, which breaks down the bearing's lubricant fast. Less is more here.
So, when do you know it's time to replace bearings, instead of just greasing them? If the bearing has play (wiggle the roller back and forth-if there's more than a tiny bit of give, it's bad), if you see rust or pitting on the bearing's metal, or if the grinding noise doesn't go away after you grease it. Greasing is a maintenance step, not a fix for a worn bearing.

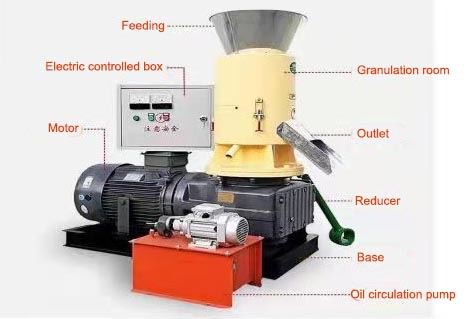
At the end of the day, taking 30 minutes to replace bearings saves you hours of downtime on the job. If you're not sure which bearing you need, or if you need a replacement machine (or parts for your current one), don't hesitate to reach out. We sell Wood Chipper Machine lineups for all sizes, from small residential models to heavy-duty commercial units, plus all the replacement parts you need to keep your equipment running. And if you're looking to expand your setup, our Biomass Pellet Equipment works seamlessly with most of our chippers to turn wood chips into finished pellets.
Before I wrap up, a quick safety reminder: always wear gloves and safety glasses when working on any power equipment. Wood dust is bad for your lungs, and metal shavings can fly. If you're dealing with a really stuck bearing, or if your machine has a more complex setup (like a self-feeding commercial chipper), it's totally fine to call a professional. No shame in that-we've all been there.
If you're in the market for a new wood chipper, or need genuine replacement bearings and parts, feel free to get in touch with our team to discuss your needs. We'll make sure you get the right parts and support to keep your machine running smooth.
References
Chipper Safety & Maintenance Guidelines, National Fire Protection Association (NFPA)
Bearing Installation and Maintenance Guide, SKF Group
Commercial Wood Chipper Operation & Repair Manual, International Society of Arboriculture (ISA)